In my experience rust manifests itself in three ways on an
automobile. A) Minor rust due to scratched
in the paint. B) Surface rust where the
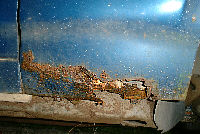
paint has totally come off and in some cases the metal has started to pit. C) Major rust, where the rust has penetrated the steel to
the point of creating holes. In this article I will attempt to address the ways that I
have found effective in repairing rust in each of these three categories.
A) Minor Rust –
If a scratch in the paint penetrates down to the steel it will create rust,
which will worsen with exposure to everything from
rain to pressure washing
. Obviously the
best action to prevent rust in this case is to touch-up the paint immediately after the
scratch appears thereby preventing the rust from ever becoming a problem. In the event
that a scratch is allowed to rust then the following steps may be taken to remedy the
problem. 1) Take a piece of 400 grit or finer sandpaper and fold it over to create an edge
for which you will use to sand the rust out of the scratch. 2) (Optional but preferred)
Purchase (if you don’t already have it) some "Metal Etch"
solution and apply it to the freshly sanded scratch per manufacturers instructions. 3)
Using a touch-up paint that matches your car apply per instructions to the scratch. After
the paint has cured you can also lightly Color Sand and Buff out the surface.
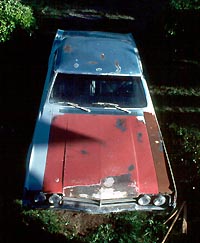
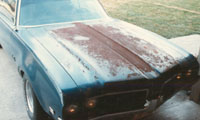
B) Surface
Rust – This type of rust will usually require a complete
panel repair
and repaint. To fully remove the rust (especially if pitting has occurred) you may
need to take the following steps 1) Chemically
or Mechanically remove all visible rust – typically the steel
will exhibit a dark gray color. On my ’69 442 I had to sand blast the entire hood of
the car which was badly pitted. 2) After the rust has been removed, remove the surrounding paint on that same panel and metal etch the steel. 3) Prepare and Paint the
surface. 4) (Optional but recommended) Once the paint has cured Color
Sand and Buff out the surface.
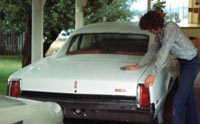
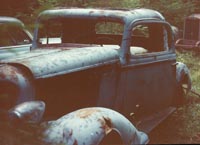
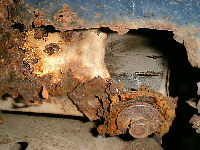
C) Major Rust –
Follow Step 1) above 2) Now we are getting out of my expertise. I am
facing a similar challenge on my ’67 Cutlass and I am looking to have a professional
cut out what is left of the offending rust and weld in a new piece of
sheet metal. My
welding skills are non-existent so therefore I must turn to someone else for help.
However, one thing I am seriously considering doing is having the car dipped in a
non-corrosive bath to further remove all traces of rust before I turn it over to the
pro’s. A dip will help to remove all of the paint and road buildup that the car had
seen over the years and it will clean the glue out of the window surrounds and will help
guarantee that I have gotten all of the rust in the nooks and crannies. If I take this
approach I will be sure and publish the results here. The next steps once the car has had
all of its rust removed and sheetmetal replaced would be the same as 2)
and 3) above.
Well good luck, I hope I have been of some help and be sure and let
me know how your projects turn out. If you would like to showcase some of your projects or
work here, drop me a line and we will be glad to consider putting up a article for you to
share your experiences. I am by no means a professional as most of you reading this are
not either, and I always appreciate information that I can pass on to others. Please keep
in mind the fact that I am sharing my experiences with whoever might find them helpful in
any way but please don’t construe them as advice and always do further homework
before tackling any major project. Everyone’s circumstances are different and I
wouldn’t want to lead to astray.
Definitions: